What's New
- Multi factor authentication Integration for WITSML Credentials
- Landing popup - We have a popup where we can select what you want to do in the user preference app and user will be redirected to the settings based on the selection
- Application Integrations: You can either integrate the UI into your application or integrate the API's into UI
Introduction
The User Preference application allows users to create profile(s), manage profile assignments, notification settings and obtain WITSML credentials for the user. The application handles the user preferences to be applied while consuming WITSML data. Users have the capability to create/edit up to 3 profiles with different preferences and apply those to specific applications as desired. This manual will walk you through the features and functionality of the User Preference application.
Access and Credentials
Users can use their Okta-registered credentials to log in, or they can be redirected from another application that provides an option to open the User Preference application
User Permissions
There are two user types available in User Preferences.
- Administrator user:Admins have additional features than end users, they can manage other users via the User Lookup field, reset user preferences for an end user, perform user lookups, and access the audit trail of user’s activities for troubleshooting purposes.
- Normal user: An end user that can create profiles, set preferences, and assign a user’s profile to the desired application. End users will not see the admin features available (User Lookup and Audit trail).
The users must be registered with OKTA in order to access the application. Users will have access to the wells\wellbores which they are entitled to.
Navigating The Application
Login Page
The system is accessible to all registered internal and external users. The data, however, is shown dependent on the logged-in user's entitlements
- For User Preferences login using the URL: https://rtsuserpref.ienergy.halliburton.com/ using your Halliburton credentials.

Home Page
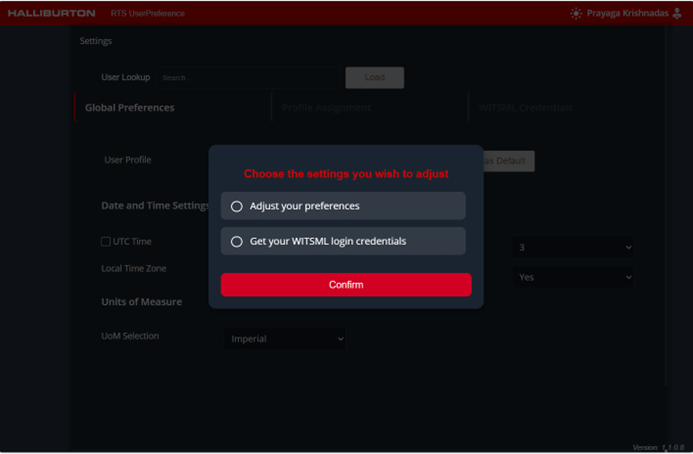
After logged in the user preference application the navigation pop up options will be displayed with the below options
- ➤ Adjust your preferences - Navigate to Global Preferences tab
- ➤ Get your WITSML login credentials - Navigate to WITSML Credentials tab
Based on the selection the end user will be directed to the specific tab within the application.
Menu
In the application menu tab, the below options are displayed.
- Global Preferences Tab: It will display the preferences settings available to users.
- Profile Assignment Tab: User can select and apply a preferred profile to specific or all application he is entitled to.
- WITSML Credentials Tab: User can create, generate or disable WITSML credentials to securely access its data.
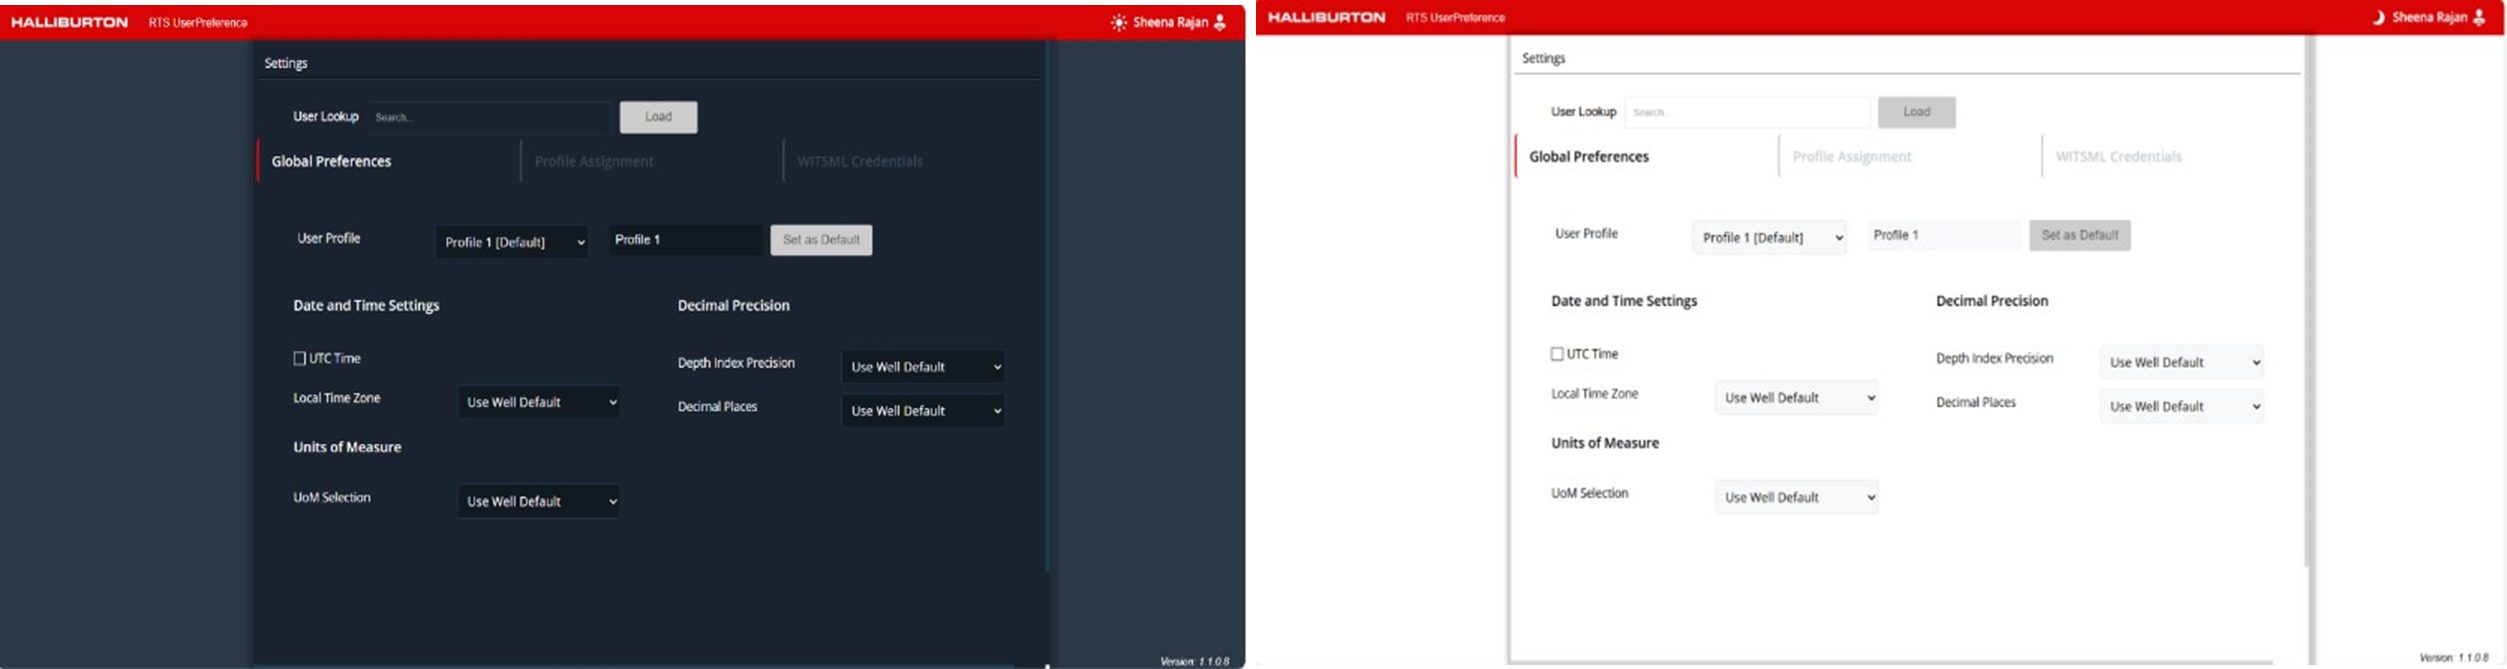
Theme
The application theme can be toggled between day and night theme based on the user's preference by clicking on the theme icon in the top bar.
Application Modules (Tabs)
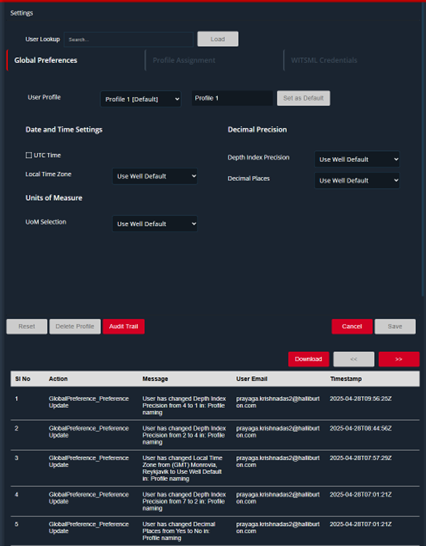
Global Preferences Screen
The Global Preference page allows users to manage their application-level preferences for profiles, units, date/time settings, and more. It supports up to three user profiles, giving flexibility in how data is displayed and managed.
Common Features (Normal & Admin Users)
- ➤
Profile Creation
- Each user can have a maximum of 3 profiles.
- One profile is created by default and set as the Default Profile.
- Users can: Create new profiles, edit existing profiles, set any profile as the new default.
- The default profile cannot be deleted.
- ➤Preferences Per Profile
- Each profile allows configuration of the following:
- Decimal Precision & Depth Precision
- Choose the level of precision for decimal values and depth display.
- Date and Time Settings. Users can choose between: UTC (Universal Coordinated Time) or Local Time Zone, selectable via dropdown. If the UTC option is enabled, local time zone is disabled.
- Units of Measure (UOM)
- Supported unit sets include are Imperial, Metric, WITSML Metric & WITSML Imperial
- Each profile allows configuration of the following:
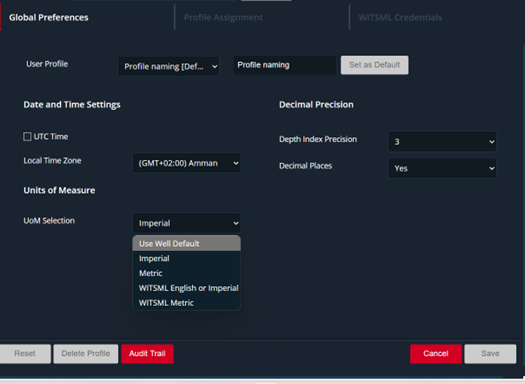
- ➤Action Buttons
- Reset: It’s enabled when changes are made. Restores profile to last saved state.
- Delete: Deletes a profile. Default profile cannot be deleted.
- Save: Saves all profile configurations. Supports saving changes for one or all profiles at once.
- Cancel: Closes the preference panel without saving changes.
Normal User View
Normal users will have access to all the common features mentioned above. They can manage their own preferences but cannot view or modify settings for other users.
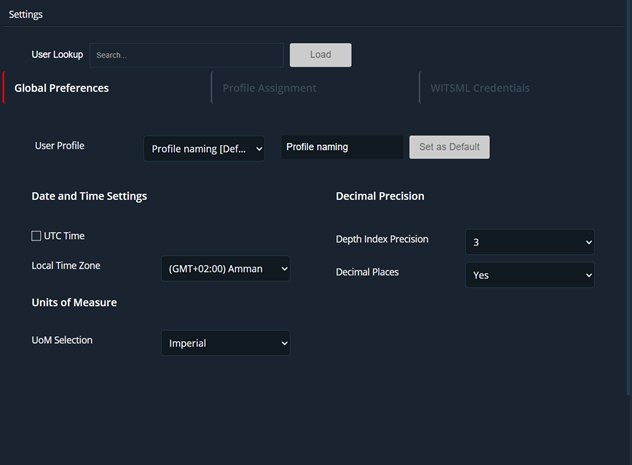
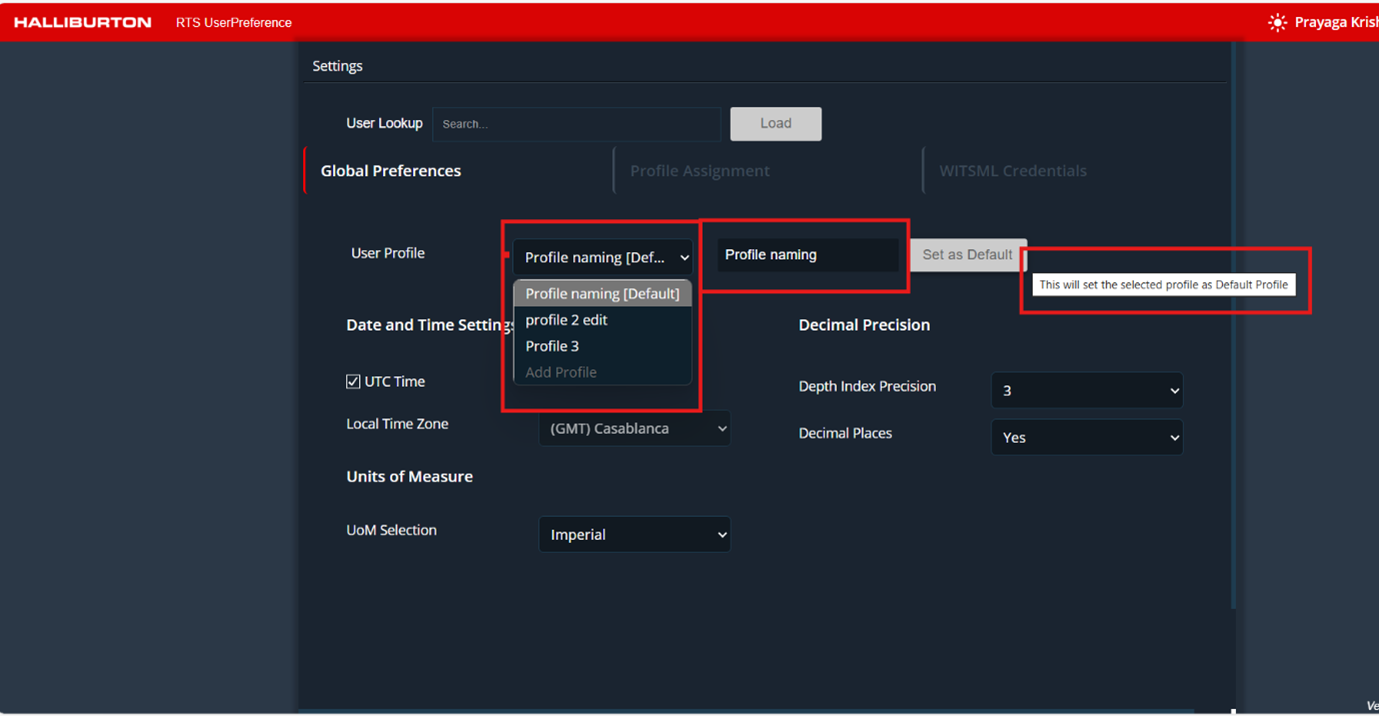
Adding or Editing User Profile
In the User profile drop down options, we can edit or add user profiles (a maximum of three user profiles are available for users). By default, all profiles will be set to Use Well Default option.
The user can modify the profile name by typing in profile text box and click save. Also, the user can set any one of the created profiles as a default profile by clicking “Set as Default” button and saved it as shown in the figure below.
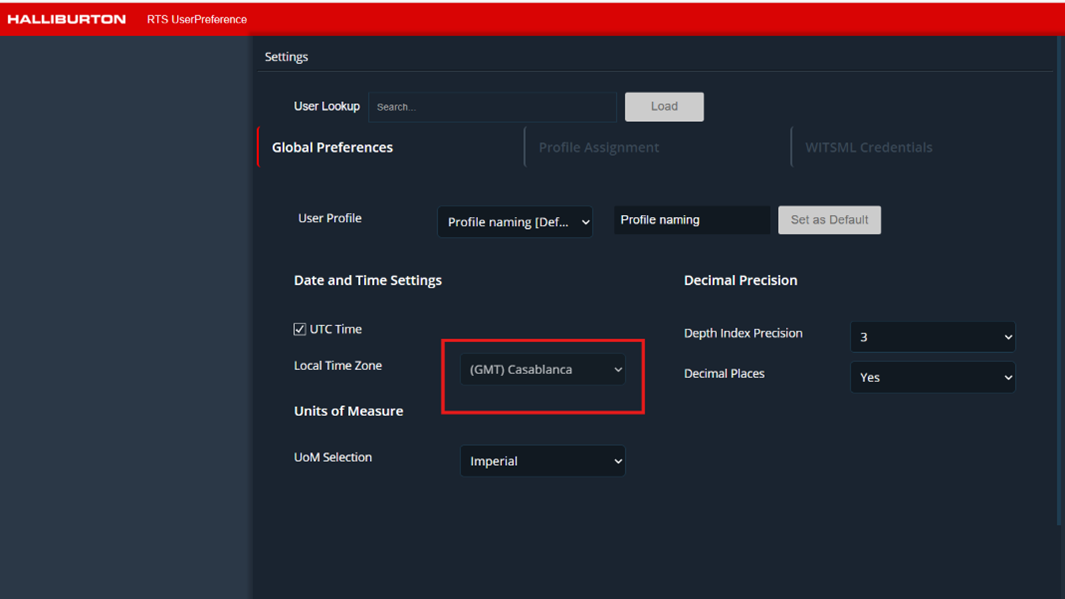
Date and Time setting
In this section, users can choose to display time in either UTC, well default time zone or their time zone of choice. By default, for all profiles the time zone will be set to Use Well Default.
A checkbox is provided to enable UTC time. If checked, the end user will consume and visualize all well data in UTC time. If unchecked, the application will revert back to Use Well Default and the selection dropdown menu will become active to set the time zone of choice.
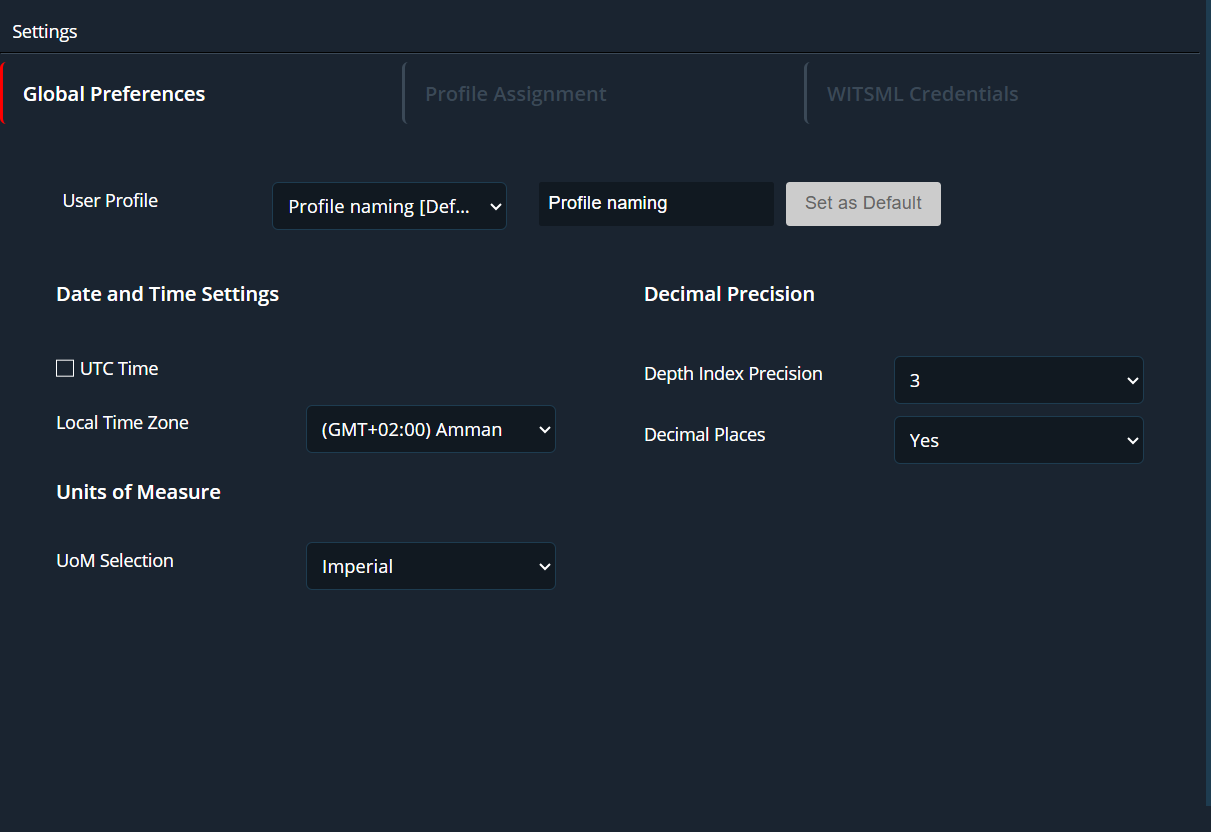
Units of measure
The user will be able to choose a UoM from the selection. The list contains Metric, Imperial, WITSML Metric, WITSML Imperial as unit sets to select. This will allow the user to view the data in the respective UoM when the respective profile is chosen. By default, User Well Default will be selected.
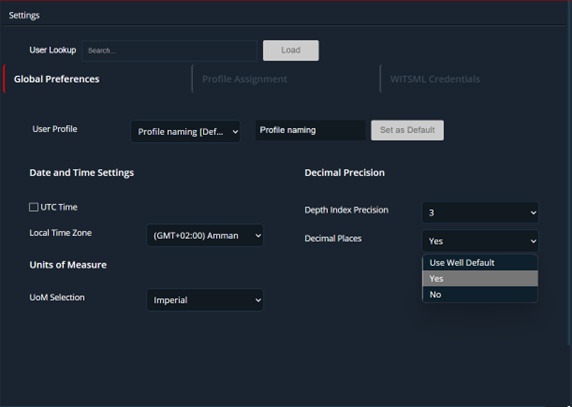
Decimal Precision
Two options are available
- Depth Index Precision: the user can choose from a scale of 0 to 10 for depth index or use well default.
- Decimal Places: the user can chose well defaults or select yes or no options.
Admin User View
Administrators have all the privileges of a normal user, with the following additional capabilities:
- User Lookup: Admins can search users by email or name.
- View and edit all profiles for any selected user.
- Click Reset All to restore all preferences to default for a specific user.
- Audit Trail: Allows admins to view and download user activity logs related to Global
Preferences for troubleshooting purposes. Audit trail has the following features:
- Search by user email, displaying the last 20 records.
- Pagination to navigate through additional records.
- Download option for exporting reports.
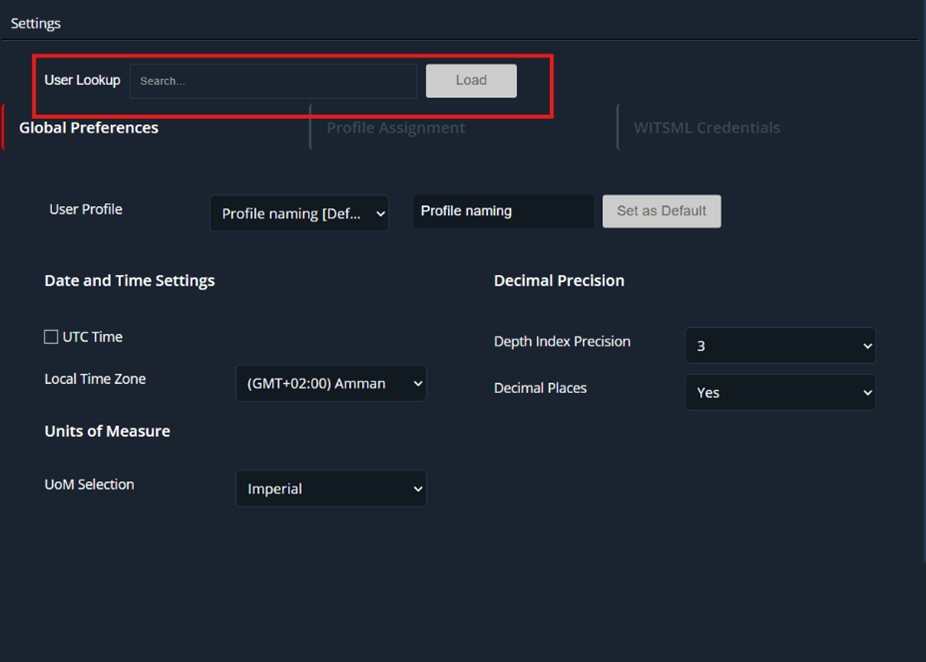
Users Lookup
This option displays only for admin users logged in this application. If we enter other user email id in the textbox and click the load button. The given id user’s profiles will be retrieve and displays here.
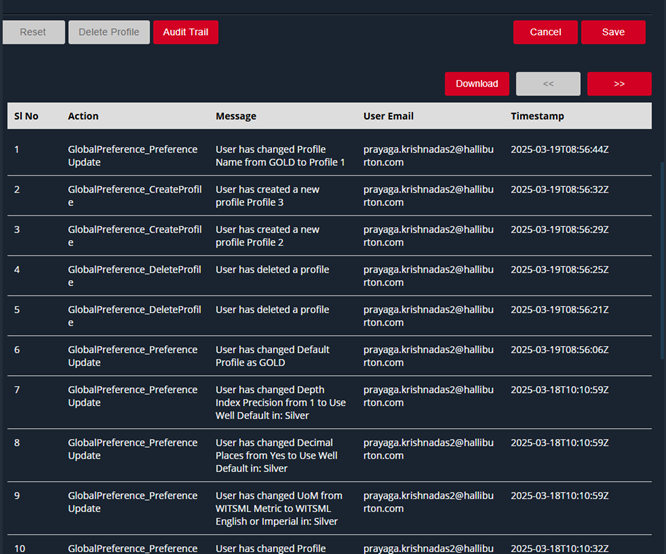
Audit Trail
In the global preference page at the bottom of the page, Audit trail button is displayed for the admin user only. If we click the button the logs are displayed below Audit trail is a sequence of entries that capture changes made in the application by all the users. Each audit log entry provides the following information:
- Sl. No – Serial number
- Action – The action page will be displayed
- Message – The detail message of the action will be displayed. CRUD operations are displayed (All, Add, Update, Delete).
- User Email – The User email id will be displayed
- Timestamp – The time (UTC time) that was audited.
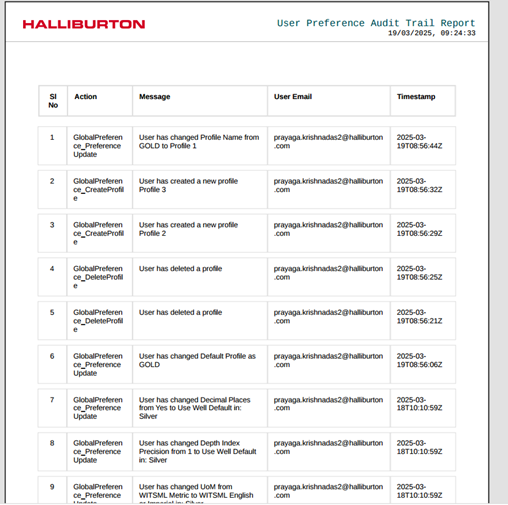
Download button for getting all logs in the PDF format, maximum 20 logs will be displayed. Pagination is available.
Audit trail pdf file example
Profile Assignment Screen
This screen displays the list of available profiles options that can be applied to all the real time applications the user is entitle
- User can select to apply Well Defaults or the designated Default profile as it preferred profile
to
use.
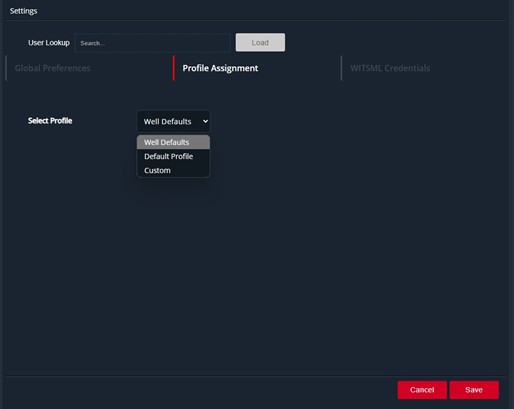
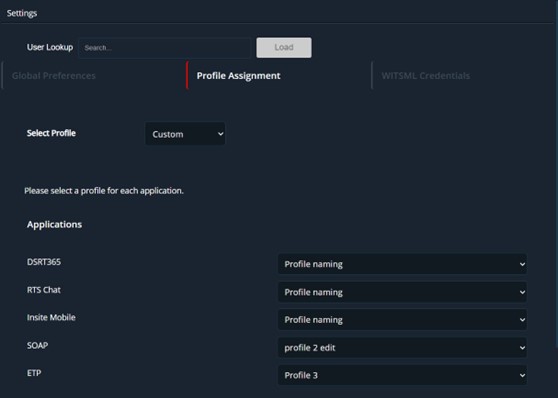
- When Custom is selected a list of all real time applications the user has access to will appear and the user can choose which of the 3 profiles option desire to apply to a specific application.
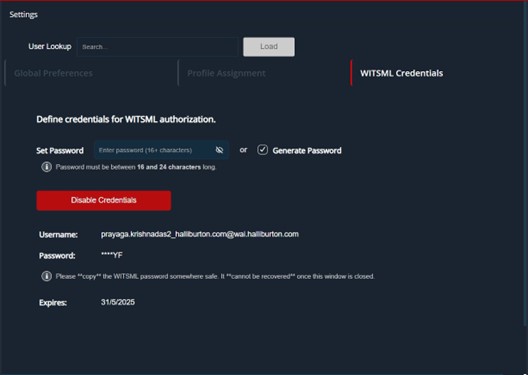
WITSML Credentials
WITSML Credentials tab displays the set password, generate password, Disable credentials, username, password and expires date.
Disable Credentials.If user clicks this button, it will deactivate the current user’s credentials that have been generated.
- By clicking the “Disable Credentials” button, the confirmation popup with yes and no option will
be displayed.
- By selecting Yes, the password field turns into the Disabled.
- The password sets to Disabled
- Expires sets N/A.
There are two ways the user can generate their credentials.
- Set the password manually in the text box area (password must be at least 16 characters long but no more than 24 characters) or,
- Click the generate password checkbox.
- The service automatically sets an expiration date for the latest credentials generated.
Once the user generates their password and clicks the save button a one-minute progress bar will be displayed, allowing the user to copy the username and password generated.
Note: If a user does not copy the username and password to a secure location, it will need to generate new credentials if the user cannot remember it. Once the password is generated it will be encrypted in the UI.
Generate password:- By clicking the Generate password checkbox.
- Click the save button and the one-minute progress bar will be displayed. In that time, user is able to copy the username and password. If user does not copy the username and password to a secure location, it will need to generate new credentials if he cannot remember it.
- Sets a expires date.
How To Use
Settings Up User PreferenceGenerating WITSML Credentials